Broadcasting in NextGenSwitch
Broadcasting refers to the process of sending a single message to a large group of recipients simultaneously. In the context of NextGenSwitch, this could be a voice call and SMS campaign targeted to specific groups or audiences. By leveraging cutting-edge technology, NextGenSwitch ensures your broadcasts are seamless, scalable and reliable.

Key Benefits of Broadcasting
Reach a Wide Audience Instantly: With broadcasting, you can send your voice or sms to thousands of recipients in couple of minutes. This is ideal for:
- Announcing promotions or discounts.
- Sending emergency alerts.
- Running marketing campaigns.
Cost-Effective Communication: Rather than reaching out to individuals manually, broadcasting automates the process, saving both time and money.
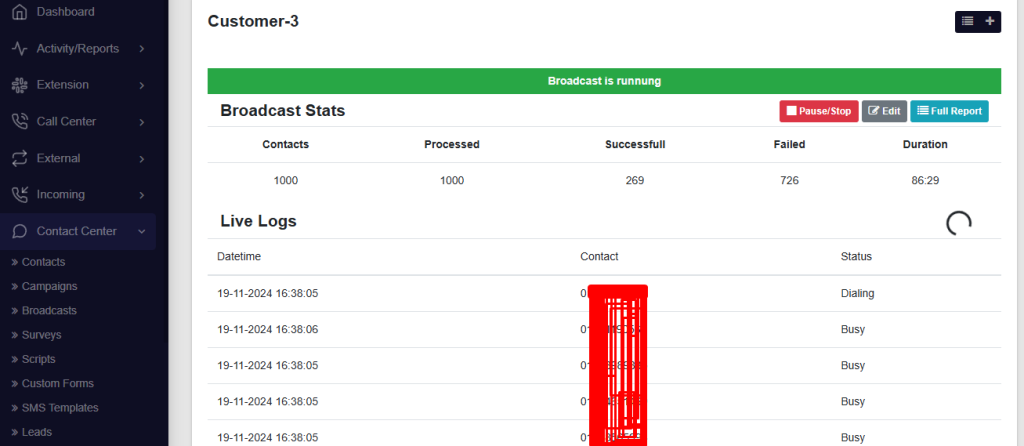
Enhanced Engagement Tracking: Track the performance of your broadcast campaigns with detailed analytics. Monitor delivery rates and audience responses in real-time.
How to Create a Broadcast in NextGenSwitch
To create a broadcast, go to the “Broadcast” section from the Contact Center. Click the “Create New Broadcast” button and fill up the required fields.
Name Your Broadcast: Start by giving your broadcast a name. Choose something descriptive like “Weekly Update” or “Customer Follow-up,” so you can identify it easily later.
Choose the “From Number”: This is the number that will show as the sender of your broadcast. Enter a valid phone number to proceed.
Select a Contact Group: Pick the group of people you want to reach.
Set the Max Try and Call Limit
- Max Try: Decide how many times the system should retry if a call fails (e.g., 1 retry).
- Call Limit: Set how many calls can go out at the same time (e.g., 3 calls).
Choose the Timezone: Make sure your broadcast goes out at the right time by selecting the correct timezone for your audience.
Schedule Your Broadcast
- Start Time: When should your broadcast begin each day? Enter the time (e.g., 08:00 for 8 AM).
- End Time: When should it stop? (e.g., 18:00 for 6 PM).
- Days: Pick the days for your broadcast—Monday through Sunday.
Select a Destination: Finally, choose where your broadcast should go. Select a module or destination from the list provided.
Save Your Broadcast: Double-check all the details, then click Add Broadcast. Your broadcast is now ready to run!
Manage your Broadcast:

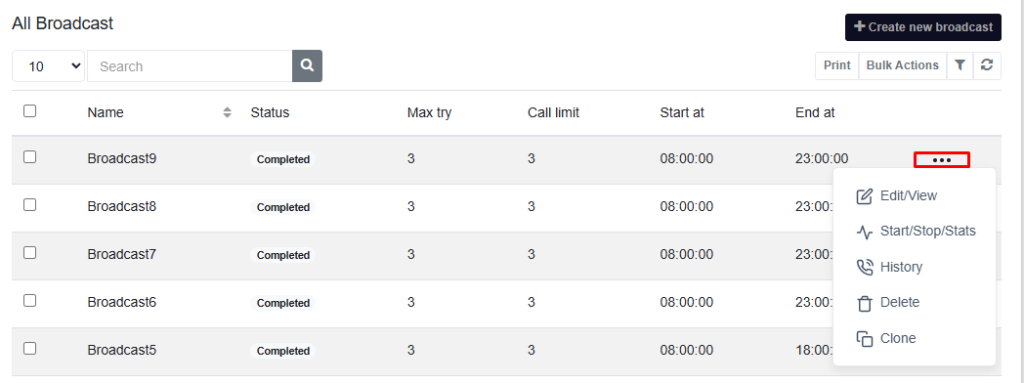
You can manage broadcasts by clicking the three-dot menu on the right. The available options include:
- Edit/View
- Start/Stop/Stats
- History
- Delete
- Clone
Broadcast History

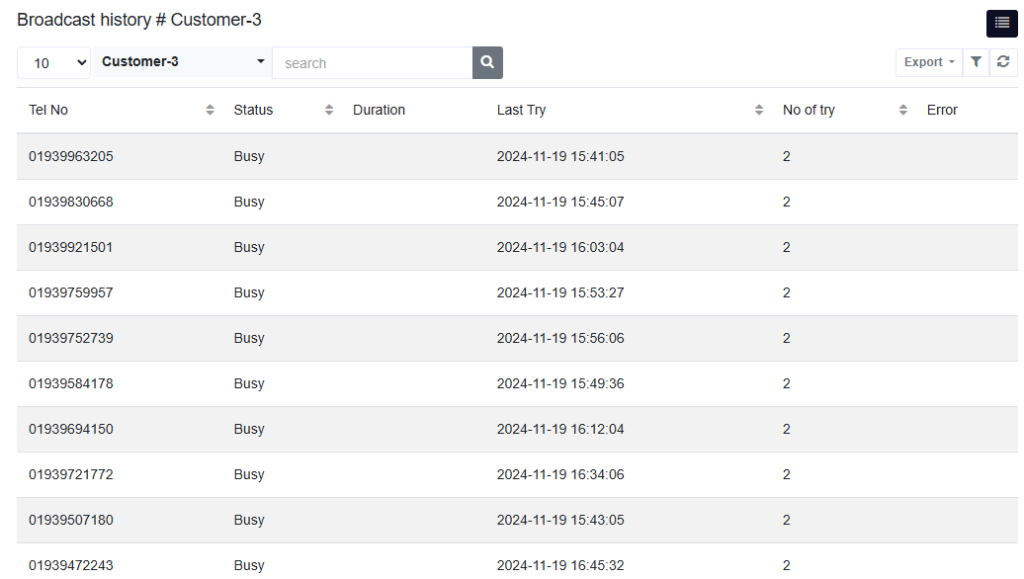
The Broadcast History section provides detailed insights into the performance and activities of each broadcast. Key information includes:
- Contact Number (Tel No): The contact number of the recipient.
- Status: The current status of the attempt (e.g., Successfull, Busy).
- Duration: The call duration, if applicable.
- Last Try: The timestamp of the most recent attempt to reach the recipient.
- Number of Tries: The total number of attempts made to contact the recipient.
- Error: Any error messages or reasons for failed attempts, if applicable.